Gardening Made Simple.
Water is essential for every living thing, and your vegetable garden is no different. However, not all watering methods work the same. Some waste water, encourage weeds, or even harm your plants. If you want a healthier, more productive vegetable garden and want to save time and water, drip irrigation is a solution you should consider.
This method delivers water right to the roots, where your plants need it most. But how does it work? Is it really worth the investment for a home gardener? And what do you need to know to install and maintain a system that fits your needs? Let’s dig deep into how drip irrigation can transform your vegetable garden, with practical guidance, real-world examples, and expert tips you won’t find in most beginner guides.
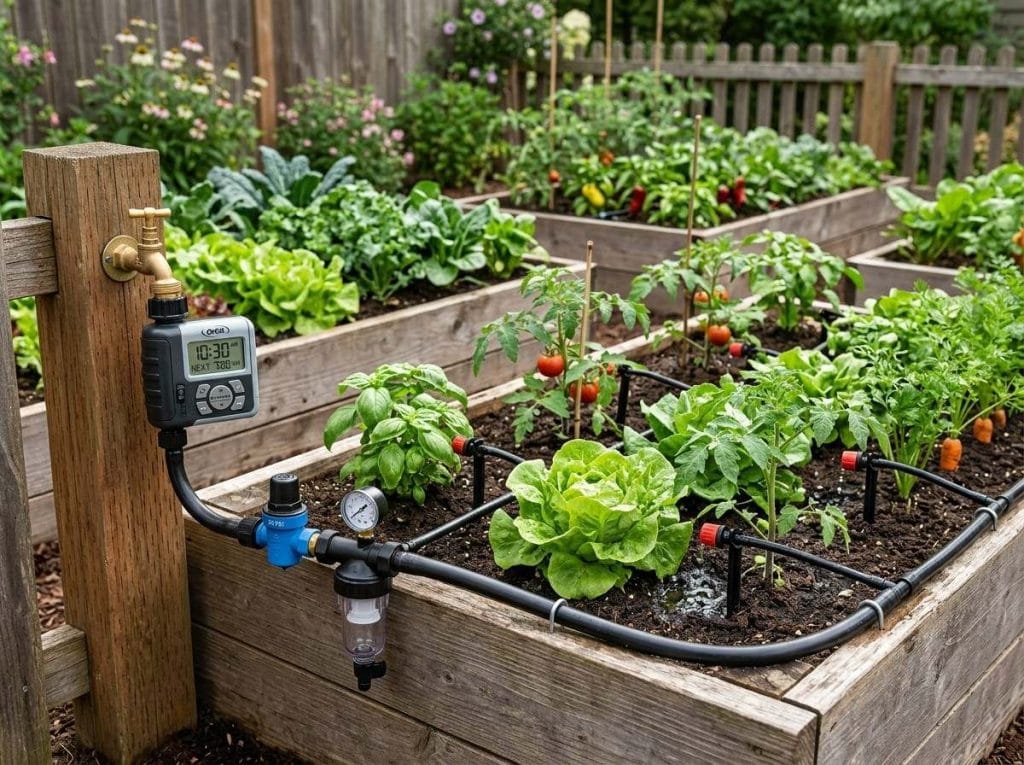
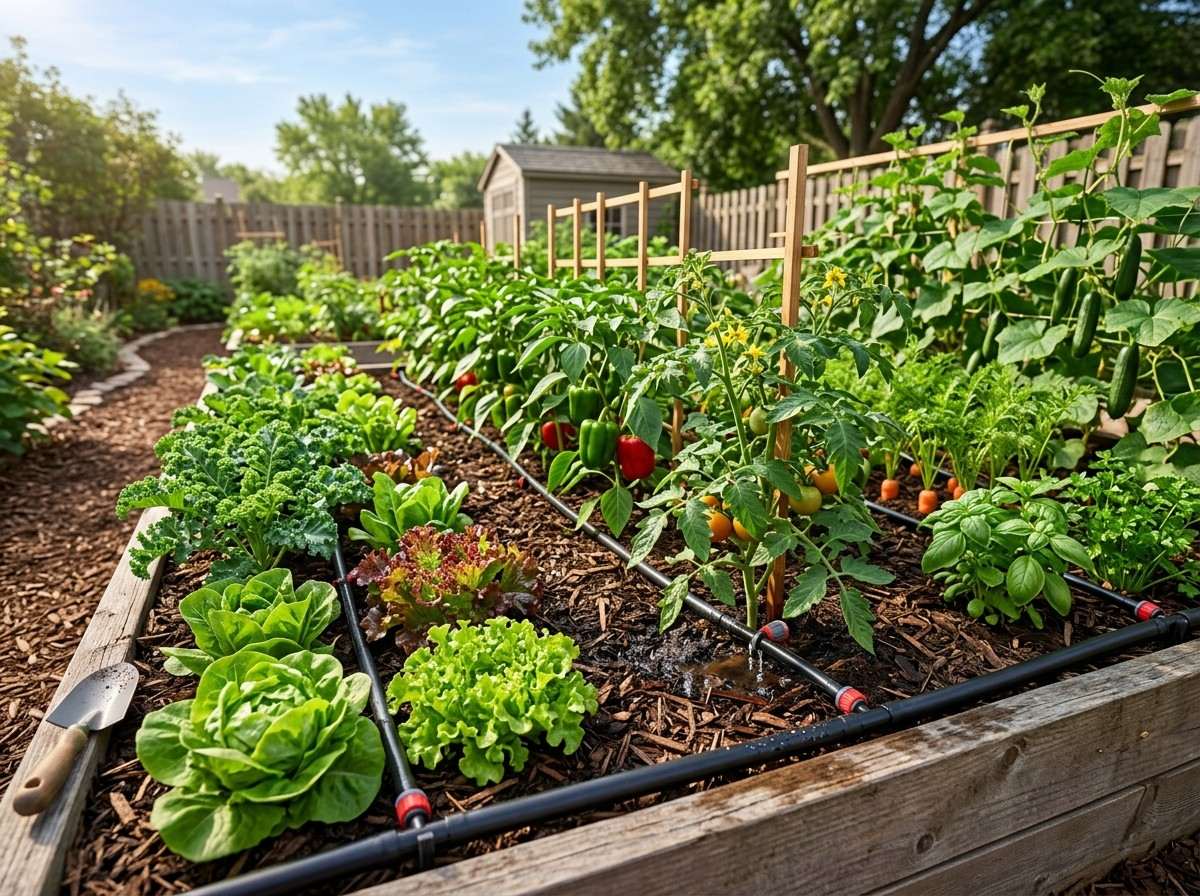
Drip irrigation is a watering system that slowly delivers water directly to the base of plants using a network of tubes, pipes, and emitters. Unlike sprinklers, which spray water over a large area (often wasting water to evaporation or wind), drip systems provide a slow, steady supply of moisture right where plants need it—at the root zone.
This system can be automated or manual, above ground or buried just under the soil surface. The main parts include a water source, filter, pressure regulator, main hose (supply line), smaller tubing (drip lines), and emitters that control how much water is released to each plant.
Drip irrigation is one of the most water-efficient ways to irrigate crops. According to the US Environmental Protection Agency, drip systems can save between 30% and 50% more water compared to traditional overhead sprinklers. This is because water is delivered directly to the soil around plant roots, minimizing evaporation and runoff. In dry regions or during drought, drip irrigation is often the only practical way to keep vegetables healthy.
When you water only the soil and not the leaves, you reduce the risk of fungal diseases like powdery mildew and blight. Wet leaves are the perfect environment for disease to spread, especially in humid weather. Drip irrigation keeps foliage dry, which is particularly important for tomatoes, cucumbers, and other disease-prone crops.
Consistent soil moisture also means less plant stress and more uniform growth. This usually leads to higher yields, better tasting vegetables, and fewer issues with fruit cracking or splitting.
Hand watering a large garden is time-consuming and inconsistent. A well-designed drip system can save hours each week. If you add a timer, you can set it and forget it—your plants are watered even if you’re busy or away.
Because drip systems target only the plants you want to grow, less water reaches empty soil where weeds can take hold. Over time, this means less weeding and healthier vegetables.
Drip irrigation systems can be adapted to any garden size or shape—raised beds, rows, containers, or even vertical gardens. You can start small and expand as needed.
Understanding the main parts of a drip irrigation system helps you plan, install, and maintain your setup more effectively. Here’s a breakdown of the essential components:
| Component | Purpose | Notes |
|---|---|---|
| Water Source | Supplies water to the system | Faucet, rain barrel, or main line |
| Filter | Removes debris to prevent clogs | Essential for longevity |
| Pressure Regulator | Reduces pressure to safe levels | Prevents damage to drip lines |
| Main Line Tubing | Moves water from source to garden | Usually 1/2" or 5/8" diameter |
| Drip Tubing/Drip Tape | Delivers water along rows or beds | Has built-in emitters or holes |
| Emitters | Controls water flow to each plant | Different flow rates available |
| Fittings & Connectors | Joins parts of the system | Elbows, tees, end caps |
| Timer (optional) | Automates watering schedule | Battery or solar powered |
| Stakes & Hold-downs | Keeps tubing in place | Prevents shifting or tangling |
Choosing the right system depends on your garden size, layout, and the types of vegetables you grow. Here’s an overview of the most common types:
Drip tape is a flat, flexible tubing with evenly spaced holes or emitters. It’s ideal for long, straight rows of crops like carrots, onions, and lettuce. Drip tape is economical and easy to lay out, but it’s less durable than other options and often needs replacing after a season or two.
This round tubing has built-in emitters at set intervals (usually every 6, 12, or 18 inches). It’s great for raised beds, mixed plantings, and uneven rows. Emitter tubing lasts for several years and is less likely to clog than drip tape.
For larger plants like tomatoes, peppers, or squash, you can use individual emitters or drippers. These are attached to the main line and deliver water directly to the base of each plant. You can choose different flow rates for different plants.
These deliver water in a small spray or bubble pattern. They’re helpful for covering wider areas, clusters of plants, or where soil coverage is uneven. However, they use more water and create wetter foliage than true drip emitters, so they’re best for certain situations, not as a primary system.
A little time spent planning will save you headaches later. Here are the key steps:
Draw your garden to scale on paper. Note the location of beds, rows, and paths. Mark where your water source is and any obstacles (trees, fences, slopes).
Not all vegetables need the same amount of water. For example, leafy greens like lettuce and spinach need more frequent watering than root crops like carrots or beets. Group vegetables with similar needs together in zones. This allows you to adjust watering times and amounts for each group.
Record the length and width of each bed or row. This will help you calculate how much tubing, tape, and connectors you’ll need.
Decide if you’ll run main line tubing along one edge or down the middle of each bed. For wide beds, you might need two or more parallel drip lines. Leave enough slack for easy maintenance.
If you plan to expand your garden, install a system that allows you to add more lines or emitters in the future. Using standard-sized tubing and connectors helps with future upgrades.
You don’t need to be a plumber or a professional landscaper to set up a drip system. With the right tools and a bit of patience, most home gardeners can install a basic system in a weekend.
You’ll need:
Connect the filter and pressure regulator to your faucet or water barrel. This protects your system from debris and damage.
Run the main line tubing from your water source to the garden. Use stakes to hold it in place, avoiding sharp bends that can kink the tubing.
Attach drip tubing or drip tape to the main line using connectors. Lay the drip lines along the plant rows or beds. Keep lines close to the base of plants for best water delivery.
If you’re using individual emitters, use a hole punch tool to make holes in the main line where you want water delivered. Insert the emitters and run small lengths of tubing to each plant if needed.
Before closing off the ends, open the water and let it run for a few minutes. This clears any debris that may have entered during setup.
Seal the ends of all tubing with end caps or figure-eight clamps. Make sure everything is secure.
Turn the water on and check for leaks, clogs, or uneven water flow. Adjust emitters or add more as needed to ensure each plant gets enough water.
A timer is a small investment that saves time and ensures your plants are watered consistently, even if you’re away.
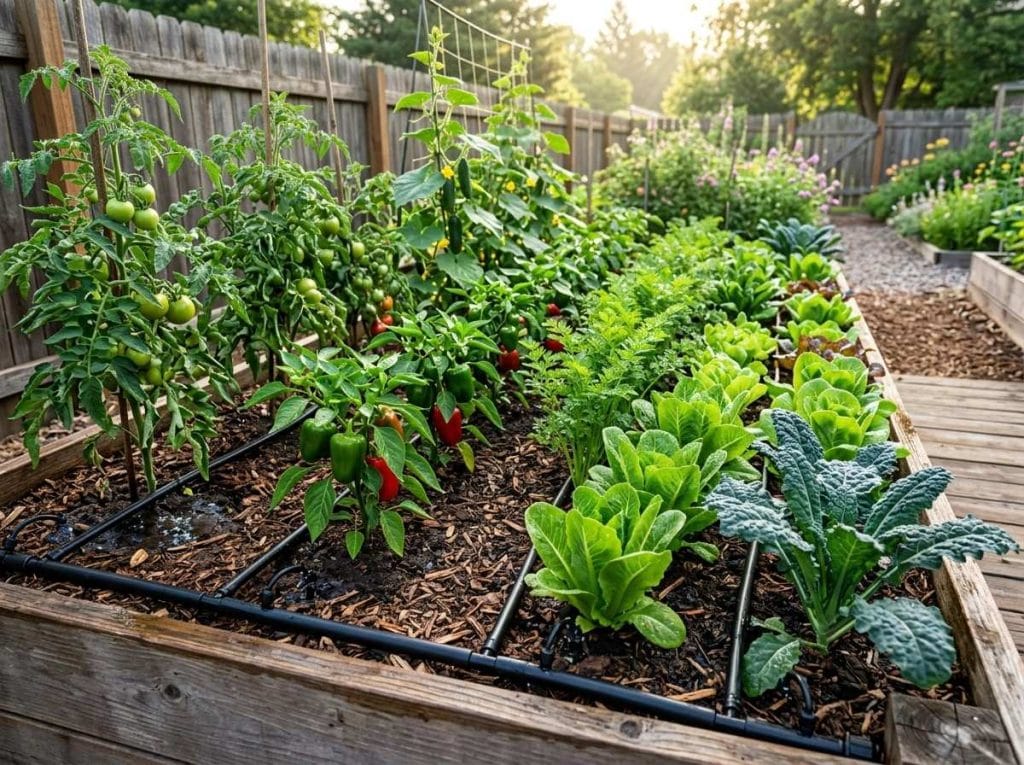
Water needs vary by crop, soil type, and weather. As a general rule, most vegetables need 1 to 1.5 inches of water per week (including rainfall). With drip irrigation, this usually means running the system for 30–60 minutes, 2–3 times a week.
However, sandy soils drain quickly and may need shorter, more frequent watering. Clay soils hold water longer and need less frequent irrigation. Always check soil moisture with your finger or a moisture meter. The soil should be moist but not soggy, at least 4–6 inches deep.
| Vegetable | Emitter Flow Rate (GPH) | Minutes per Week | Frequency |
|---|---|---|---|
| Tomatoes | 1–2 | 90–120 | 2–3x/week |
| Lettuce | 0.5–1 | 60–90 | 3–4x/week |
| Carrots | 0.5 | 45–60 | 2–3x/week |
| Peppers | 1 | 60–90 | 2–3x/week |
| Beans | 0.5–1 | 60–90 | 2–3x/week |
*GPH = gallons per hour. Adjust for your climate and soil type.
The initial cost of a drip irrigation system can vary. For a small home garden (about 100 square feet), a basic setup costs between $30 and $70 if you install it yourself. Larger gardens or systems with timers, filters, and high-quality tubing may cost $100–$300 or more.
Here’s a simple comparison of initial vs. ongoing costs:
| Expense | Drip Irrigation | Sprinkler System | Hand Watering |
|---|---|---|---|
| Initial Cost | $30–$300 | $50–$400 | Minimal |
| Annual Maintenance | $10–$30 | $20–$50 | Minimal |
| Water Use | Very low | High | Medium–High |
| Labor Time | Low | Medium | High |
Keep in mind, the real savings come from lower water bills and less time spent watering. Many gardeners find their system pays for itself within a year or two.
A drip irrigation system is reliable, but it does require some care to work at its best.
Clogged emitters are common, especially if you use water from a well or pond. Use a filter and flush lines often. If an emitter is clogged, soak it in vinegar or replace it.
In cold climates, water left inside tubing can freeze and cause cracks. Before winter, drain and store portable systems, or blow out the lines if they are permanent.
Rodents sometimes chew on tubing. Bury lines a few inches below the surface or cover with mulch to protect them. UV light can also degrade tubing over time; buy UV-resistant products for longer life.
As your garden grows, you may need to move lines or add more emitters. It’s simple to punch new holes and insert additional drippers as needed.
Even experienced gardeners make mistakes with drip irrigation. Here are some of the most common—and how to avoid them:
Many beginners set their systems to run for too short a time. Remember, drip irrigation delivers water slowly. Check soil moisture regularly.
Spacing emitters too far apart can leave plants dry. Most vegetables benefit from water at both sides of the root zone, especially in wide beds.
Even clean municipal water can contain particles that clog emitters. A filter is a small investment that saves big headaches.
Too much water pressure can burst tubing or cause uneven flow. Install a pressure regulator, especially if your water source is city water.
Sediment builds up over time. Flush lines at least once per season.
Drip irrigation makes it easy to overwater if you don’t adjust for rainfall or soil type. Use a rain gauge or soil moisture meter.
How does drip irrigation compare with other ways of watering your vegetable garden? Here’s a quick look:
Many guides stop at the basics, but a few extra details can help you get even better results:
While drip irrigation works for almost every situation, there are a few exceptions. Very small container gardens may do better with hand watering. Extremely sandy soils may need more frequent, shorter watering cycles to avoid runoff. And if you grow large fields of mixed crops, a combination of drip and other methods may be best.
But for most home vegetable gardens, especially in dry or hot climates, drip irrigation offers unbeatable convenience, water savings, and better plant health.
If you want to dig deeper into the science and best practices of drip irrigation, the University of California Agriculture and Natural Resources offers an excellent, research-backed overview: Drip Irrigation for Vegetable Production.
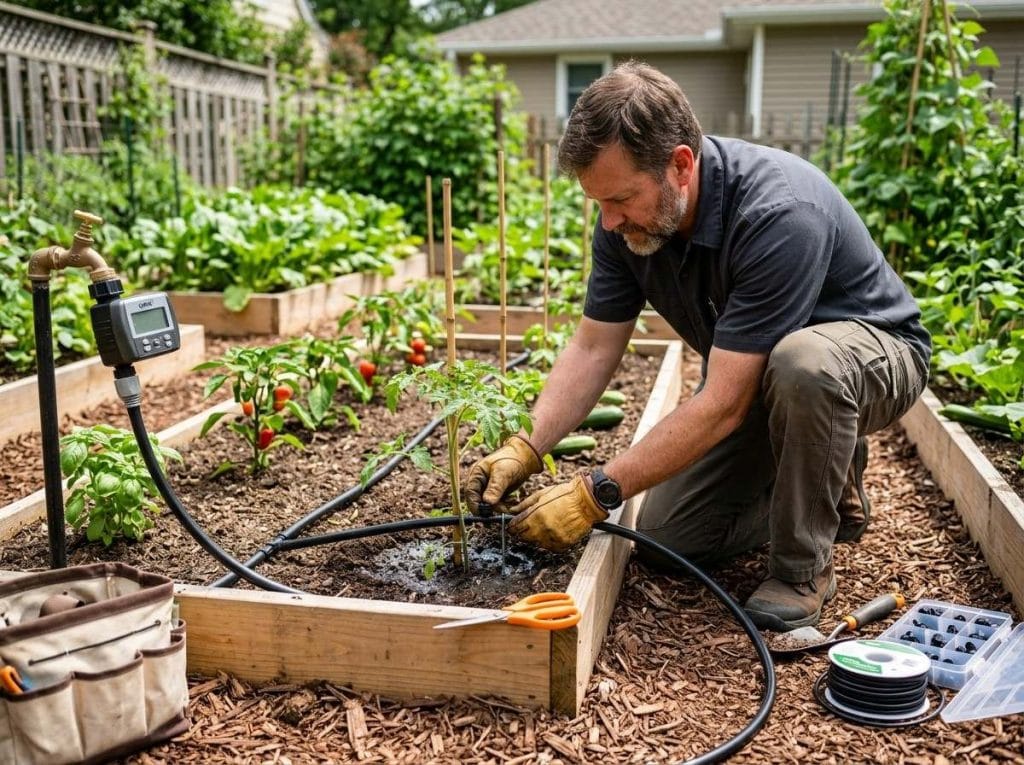
Most vegetable gardens do well with 2–3 waterings per week, running the system for 30–60 minutes each time. The exact frequency depends on your soil, weather, and crop type. Always check soil moisture a few inches below the surface to avoid over- or under-watering.
Most home gardeners can install a basic drip system without professional help. Kits are available at garden centers, and many online guides offer step-by-step instructions. For larger or more complex gardens, or if you want a buried system, you might consider hiring an expert.
Yes, but you’ll need to make sure your rain barrel is raised above the garden to create enough water pressure, or use a small pump. Always use a filter to remove debris before water enters the drip system.
Rodents and pets may chew on tubing, especially early in the season. Cover lines with mulch, bury them slightly, or use protective sleeves. Check your system regularly for damage and repair as needed.
Remove and soak clogged emitters in vinegar to dissolve mineral buildup. If they remain clogged, replace them. Regularly flushing the system and using a good filter will prevent most clogs.
A well-planned drip irrigation system can make your vegetable garden more productive, healthier, and easier to care for. It’s a smart investment for any gardener who wants to save water, time, and effort while growing delicious, home-grown food. With a bit of planning and regular maintenance, you’ll quickly see the difference in your harvests—and in your free time.